Post on 26-03-2019 09:58:44 PM
Series QV
FEATURES
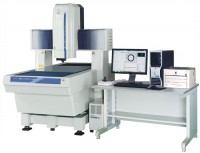
Moving-bridge type structure
Designed with primary focus on measurement efficiency, the machine adopts a more rigid construction and drives the X and Y axes at 400mm/s (QVACCEL808,ACCEL1010).
The moving-bridge type structure also eliminates the need for a moving stage. This facilitates a more simplified design of the workpiece fixture, resulting in a significant reduction in the man-hours required for fixture fabrication and inspection.
Post on 26-03-2019 09:56:41 PM
Series QV
FEATURES
- Minimizes straightness errors through the use of a precision air-bearing linear guide system.
- Utilizes a 0.01µm resolution glass scale manufactured at an ultra-precision facility located eleven meters underground.
- Minimizes accuracy fluctuation against thermal change through the use of virtually zero thermal expansion glass scales.
- Optimizes the mechanical structure of the main unit in Finite Element Method analysis.
- Stabilizes the geometrical accuracy (i.e. straightness of each axis and perpendicularity) to lessen thermal effects.
Post on 26-03-2019 09:53:59 PM
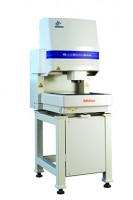
• High-accuracy, dual-head vision measuring system equipped with a white light interferometer.
• The white light interferometer uses a high aspect ratio to accurately measure shapes.
• The standard vision measuring function can continuously perform coordinate,
dimension and 3D shape measuring.
Post on 26-03-2019 09:40:54 PM
Series QV
FEATURES
Non-stop Vision Measurement Extreme Improvement in Throughput*
Conventional vision measuring systems endlessly repeat the cycle of stage displacement, stage stop, measurement, stage start and stage displacement. This mode of operation is a fundamental limitation on improving measurement throughput. In contrast, the Quick Vision Stream system uses an innovative image capture technique that avoids the need to repeatedly stop the stage, thereby allowing for continuous measurement while still maintaining accuracy.
Measurement Throughput Comparison between QV STREAM and the Conventional System
STREAM PLUS series: more than 5 times faster * Comparison of measurement throughput using a Mitutoyo sample workpiece with that of conventional Mitutoyo systems.
Newly Developed Stroboscopic Illumination System
The development of a high-intensity LED flash illuminator makes non-stop vision measurement possible. At the precise moment the stage reaches a measurement point, the illuminator creates an extremely short, high-intensity flash that effectively freezes all motion. The illuminator turns on and off so quickly that no image blur occurs, and the image is captured in full and accurate detail. This innovative design takes full advantage of high-density, high-intensity LED arrays aided by collimating lenses and dichroic mirrors to produce ultra-bright, directional and efficient illumination.
Extreme Improvement in Throughput
Conventional vision measuring systems endlessly repeat the cycle of stage displacement, stage stop, measurement, stage start and stage displacement again. This mode of operation is a fundamental limitation on improving measurement throughput. In contrast, the Quick Vision STREAM uses an innovative image capture technique that avoids the need to repeatedly stop the stage so measurement can be continuous, but measuring accuracy is retained. By eliminating the time needed to accelerate, decelerate and then hold the stage motionless while a measurement is made a drastic improvement in productivity is achieved.
Post on 26-03-2019 09:33:35 PM
Series 363
FEATURES
Tracking Auto Focus (TAF)
The TAF feature focuses continuously, adjusting to changes in the height of the object being measured.Automatic tracking of surface waves and war page (in the Z axis height direction) improves measurement
throughput. The feature also cuts out the hassle of focusing during manual measurement, reducing the
work burden for measuring system operators.
Note: Continuous measurement of displacement is not performed.
Post on 26-03-2019 09:29:11 PM
Series QV
FEATURES
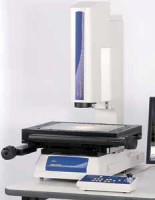
- High-quality zoom optics with interchangeable lenses
- High-resolution and high-speed color camera
- Compact design saves significant space available in two sizes
- Powerful QVPAK 3D vision software
- Contact and noncontact measurement
- Touch-probe retrofittable
- Programmable LED stage, coaxial and 4-quadrant ring light.
Post on 26-03-2019 09:27:39 PM
Series QI
FEATURES
Quick Image is a new concept in 2-D vision measuring instruments. It provides very unique features to improve measurement efficiency.
• Long focal depth and wide field of view
• Telecentric optical system
• 3 mega-pixel color CCD camera
• Large quadrant LED ring light
• Single-click measurement execution
• Displays measurement results on video
window
• Orientation of part is automatically
detected
Post on 26-03-2019 09:25:25 PM
Series QS-L
FEATURES
- • Surface, contour and fiber-optic ring
light illumination options enable users to
configure the QS lighting to meet a variety of
measurement needs.
• Powerful, Windows®-based QSPAK software
offers a spectrum of measuring and analysis
capabilities.
• Functions include auto-focus, measurement
playback, one-click edge detection, graphic
display, 48 different macros and a pattern
matching function for several common part
features.
• Excellent surface observation model for a
variety of workpieces.
• 0.1μm resolution and 150mm Z-axis range.
• Power zoom enables quick magnification
changes.
• Fine illumination capability enables lighting
changes to match workpiece requirements.
• The quick release system on the stage enables
instant switching between coarse and fine
movements.
• Quick Navigation function enables the user to
repeat measurements quickly.
Post on 26-03-2019 09:23:18 PM
Series 176
FEATURES
Optional Accessories
378-866: 10X eyepiece set (view field dia.: 24mm) (standard accessory)
378-857: 15X eyepiece set (view field dia.: 16mm)
378-858: 20X eyepiece set (view field dia.: 12mm)
Turret (Nosepiece)
378-018: Adjustable manual BF turret
378-216A: Adjustable power BF turret
176-211: Adjustable manual BF/DF turret
176-212A: Adjustable power BF/DF turret
Post on 26-03-2019 09:17:58 PM
Series 176
FEATURES
- Observation with a crisp and high-resolution erect image and a wide field of view.
- Measuring accuracy that is the highest in its class (and conforms to JIS B 7153)
- ML series, high-NA objectives that are specially designed for the MF series (long working distance type)
- Illumination unit (reflected/transmitted) selectable from a high-intensity LED or halogen bulb (selection required)
- Variable aperture diaphragm (reflected/ transmitted) allows observation measurement while suppressing light diffraction
- Variety of standardized stages in sizes up to 400×200mm
- Quick-release mechanism useful for moving the stage quickly when measuring work pieces that are large in size or quantity
- Coarse/fine feed handles equipped as standard on both sides allow precise focus and observation measurement regardless of handedness
- High-magnification eyepiece observation up to 2000×
- Standard measuring microscope that has a wide variety of optional accessories including a Vision Unit and various digital CCD cameras
Post on 26-03-2019 09:15:08 PM
Series 359
Post on 26-03-2019 09:08:48 PM
Series 176
FEATURES
The Mitutoyo TM Series is a toolmakers’ microscope well suited for measuring dimensions and angles of machined metals. It also can be used to check the shape of screws and gears by attaching an optional reticle. The compact body makes it ideal for use on shop floors with limited space.
- Angle measurement is performed easily by turning the angle scale disc to align the cross-hair reticle with the workpiece image.
- Illumination intensity can be adjusted.
- Included standard accessories create an overall magnification of 30X. Magnifications can be changed from 20 - 200X by using optional objectives and/or eyepieces.
Post on 26-03-2019 08:01:19 PM
Series 810
FEATURES
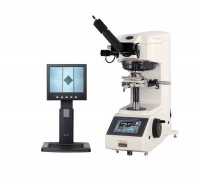
- The electromagnetic force motor used in the loading mechanism enables the test force to be freely selected (see test force specifications) over the wide range of 0.4903mN to 19610mN (0.05gf to 2 kgf). It is also possible to freely set load dwell times. Now your desire for absolute control over the indentation size in Vickers hardness testing can be satisfied. The HM-200 series always offers the test force most appropriate for the specimen material and shape.
- The long working distance objectives used enable a very comfortable working distance between the objective and the specimen surface. This, greatly reduces the possibility of collision between the specimen and the objective during focusing operations. (e.g. for 50X objectives: 1.1mm for conventional models, 2.5mm for HM-200 series)
- Newly-designed ‘MH Plan’ objectives are optimized for measuring indentation images. The lineup includes 6 types of long working distance objectives: 10X, 20X, 50X and 100X for measuring indentation images, and 2X and 5X for enabling wide-range measurement around indentations.
- LEDs, which have a longer life, produce less heat, consume less power and are more energy efficient than incandescent bulbs, are employed for the illumination system.
- The motorized turret allows for up to 4 objective lenses and 2 indenter assemblies to be mounted at the same time.
Post on 26-03-2019 07:57:34 PM
Series 810
Vickers Hardness Testing Machines – Type A
FEATURES
- Heavy load Vickers testing machines feature motorized force selection from 1-50kgf or .3 to 30kgf. Fully adjustable long-life LED illumination runs cool.
- A dual-line filar eyepiece combines with a color touch-screen LCD to create accurate measurements with the touch of a button.
- The motorized turret can accommodate up to 3 long working distance objective lenses for an even wider range of materials and a wide variety of anvils and x-y stages are also available.
Post on 26-03-2019 07:54:48 PM
Series 300
FEATURES
- The new frame design alllows the full 7.1” of specimen capcity without the need to cut a whole in the table.
- Simple to operate; The digital HR320 model uses a flashing bar graph to indicate when the initial test force has been reached.
- 430 models feature automatic brake and automatic start function that prevents overloading and begins test cycle. The HR430 model also includes the dial a weight system for easier load selection.
- All models are complete with Flat and VEE anvils, diamond and 1/6” carbide ball indenters, 2 HRC and 1 HRBW Rockwell blocks (MR models)s or 3 Rockwell blocks and an HR30N and HR30TW for MS testers
Post on 26-03-2019 07:50:20 PM
Series 810
FEATURES
- Multiple test force generation for
Rockwell, Rockwell Superficial and Brinell hardness. - Dolphin-nose indenter arm for easy reach of interior (min. ø40mm/ø22mm*) and exterior surfaces. *When using an optional diamond indenter (19BAA292).
- Real time electronic test force control for accurate loading. This perfectly eliminates load force overshooting.
- Indenter escape function for continuous testing at fixed table position. This eliminates instability caused by the table retraction.
- Auto-stop elevation table and automatic preliminary test force loading to provide stable test force generation.
- Complete with one flat and VEE anvil, diamond and 1/16” carbide ball indenters, 2 HRC and 1 HRBW Rockwell test blocks and an HR30N and HR30TW test block.
-
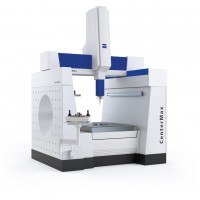
Unparalleled Stability...
27-03-2019 01:38:04 AM -
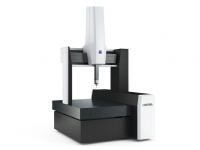
The Reference Machine in...
27-03-2019 01:28:20 AM -

SMALL PARTS COUNTER U-60
27-03-2019 01:04:31 AM
- HCMC Office: Block A, Lever 2, Linh Trung Building, No 6-8, Road no 16, Linh Trung Ward, Thu Duc City, HCMC.
- Head Quaters: 427 Le Dai Hanh, Ward 11, District 11, HCM City.
- Hanoi Office: 156A Quan Thanh Str., Ba Dinh Dist., Hanoi City.
- Phone: +84-28-66865303
- Mobile: +84 982 427 168
- Email: dung@ngocminh-ise.com
- Website: http://ngocminh-ise.com


