-
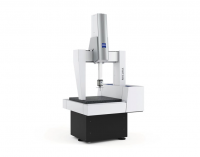
Ideal for All Measuring Tasks ZEISS PRISMO
- Post on 27-03-2019 01:31:12 AM - 2717 Views
-
High-speed scanning and maximum accuracy
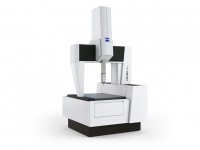
PRISMO from ZEISS is synonymous around the world for high-speed scanning and maximum accuracy in the measuring lab and near production. With length measurement error of just 0.5+L/500 micrometer, ZEISS PRISMO ultra is ideal when maximum demands on precision have to be met.
ZEISS PRISMO
FeaturesMeasuring also near production
ZEISS PRISMO is also ready for environments near production, thus eliminating a trip to the measuring lab. All machine parts critical to operations are perfectly matched. This is achieved through the use of in-house developments for all critical components.
Multi application sensor system
ZEISS PRISMO comes standard with the multi application sensor system (MASS) from ZEISS. MASS enables both contact and optical measuring on the same machine. Sensors can be changed out in just a few steps thanks to the common interface for all sensors.
Computer-Aided accuracy (CAA)
ZEISS PRISMO uses computer-guided corrections of all dynamic influences on the machine. This optimizes precision during high-speed scanning.
Turbo scanning: ZEISS VAST
ZEISS PRISMO enables high-speed with maximum precision. navigator technology is the logical enhancement to scanning from ZEISS. It automatically configures the maximum measuring speed during scanning – with guaranteed accuracy.
Additional time is saved through tangential approach and scanning, helix scanning and fast dynamic stylus calibration.


ZEISS PRISMO ultra
ZEISS PRISMO ultra further increases the accuracy of ZEISS PRISMO. This precision is achieved through more accurate scales, a modified air bearing connection, air damping and stricter matching of all machine parts.
ZEISS PRISMO ultra is therefore ideal for jobs in research, development and quality assurance, as well as for the calibration of gages and test pieces.
Options
RT-AB rotary table
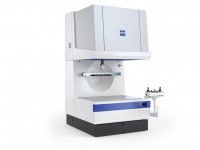
Rotary tables are an ideal addition to coordinate measuring machines - particularly for rotationally symmetric parts such as shafts, bearing rings, gear wheels and housings. The RT-AB sits on air bearings and impresses with its seemingly effortless movements, its fantastic radial and axial runout values, and the dynamism of its direct drive.
The RT-AB is available as an integrated or retrofitted system and allows you to configure the maximum speed depending on the load. The CAA-corrected positioning accuracy ensures maximum precision.
RDS-CAA select
Ensures shorter calibration times for measurements with the RDS articulating probe holder as only a few angular settings require calibration.
Additional options
- Multisensor rack
- Integration of a rotary table as the 4th axis
- Use of palletizing and loading systems
- Accept enclosure for operation near production
Technical Data for ZEISS PRISMO
|
| ZEISS VAST gold |
| Measuring range X/Y/Z | length measurement error E0 in μm |
| 7/9/5 - 7/9/7 | 0.5 + L/500 μm |
| 9/12/7 - 9/24/7 | 0.5 + L/500 μm |
| 12/18/10 - 12/42/10 | 1.2 + L/500 μm / 1.0 + L/500 μm* |
| 16/24/10 - 16/42/10 | 1.9 + L/400 μm / 1.6 + L/400 μm** |
*In the limited measuring range 800/1000/600.
**In the limited measuring range 800/1200/600.
-
Unparalleled Stability...
27-03-2019 01:38:04 AM -
The Reference Machine in...
27-03-2019 01:28:20 AM -

SMALL PARTS COUNTER U-60
27-03-2019 01:04:31 AM
- HCMC Office: Block A, Lever 2, Linh Trung Building, No 6-8, Road no 16, Linh Trung Ward, Thu Duc City, HCMC.
- Head Quaters: 427 Le Dai Hanh, Ward 11, District 11, HCM City.
- Hanoi Office: 156A Quan Thanh Str., Ba Dinh Dist., Hanoi City.
- Phone: +84-28-66865303
- Mobile: +84 982 427 168
- Email: dung@ngocminh-ise.com
- Website: http://ngocminh-ise.com


